A custom mouse cursor refers to a personalized design or style applied to the default cursor that appears when users interact with elements on a website. Instead of the standard arrow pointer (hand), a custom cursor can be tailored to match the theme, branding, or functionality of a website.
Custom mouse cursors are typically implemented using only CSS or include JavaScript. In this blog we will learn what are the ways you can create custom mouse cursors and how to implement them in your websites.
Before jumping into the how we will create custom cursor lets see why we need to create a custom cursor but with accessibility. User experience is the major part behind the CSS, you must consider user's digital accessibility features such as visibility, size, color contrast, customization options, keyboard navigation, and screen reader compatibility.
Visibility is paramount, requiring high-contrast colors and distinct shapes to aid users with visual impairments. Cursor size should be adjustable to accommodate different needs, while color contrast ensures visibility for users with color vision deficiencies.
Providing customization options allows users to tailor the cursor to their preferences. Keyboard navigation is essential for users who rely on keyboard input, and screen reader compatibility ensures that cursor-related actions are accessible to all users.
By prioritizing accessibility in cursor design, websites can better serve individuals with diverse abilities, promoting inclusivity and usability for all visitors.
Table of Content
- How to Create a Custom Cursor with CSS?
- How to Create a Mouse Cursor Using JavaScript?
- Examples of Creating Custom Cursor with JavaScript
- Websites using Custom Mouse Cursor
How to Create a Custom Cursor with CSS?
First, we will look into this easy and simple method of using mouse cursors with CSS. This part was originally made only with a CSS rule that defines the behavior of elements with the class hov when we hover over them, demonstrating how CSS can customize cursor behavior using the pointer mouse CSS property.
The :hover pseudo-class targets elements when the user hovers over them with their cursor. In this case, it specifies that when an element with the class hov is hovered over, the cursor should change to a pointer (hand).
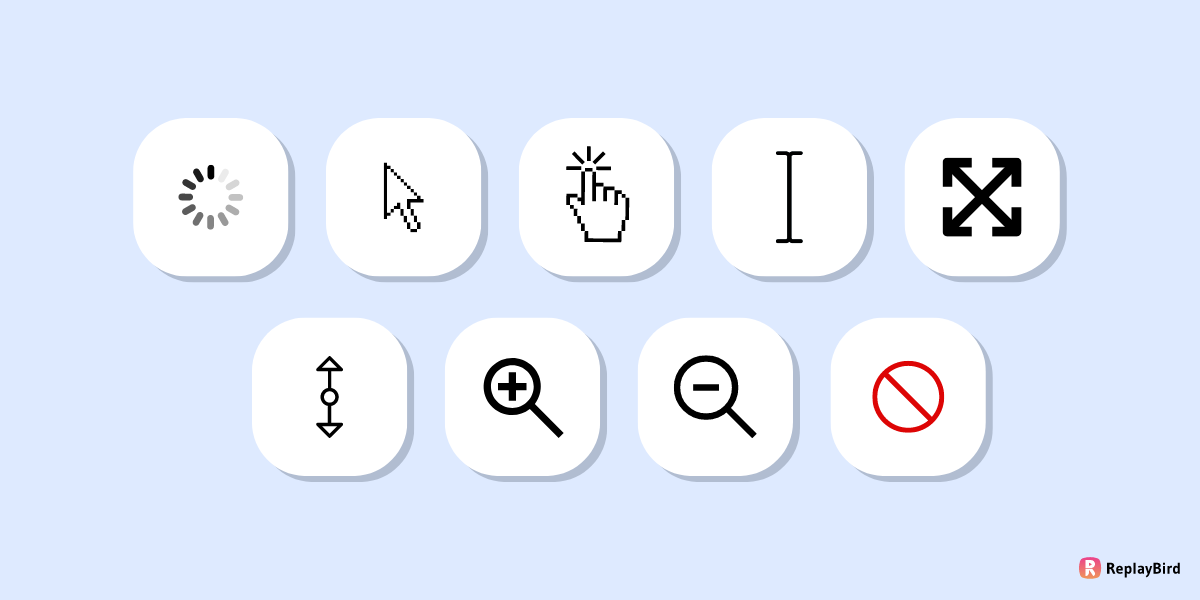
Here is an example of using a pointer cursor with its CSS property. You can replace the pointer to change the cursor on the hover CSS property from the below list.
auto |
default |
none |
context-menu |
help |
pointer |
cell |
crosshair |
text |
vertical-text |
alias |
copy |
move |
no-drop |
not-allowed |
all-scroll |
col-resize |
row-resize |
n-resize |
e-resize |
s-resize |
w-resize |
ns-resize |
ew-resize |
ne-resize |
nw-resize |
se-resize |
sw-resize |
nesw-resize |
nwse-resize |
zoom-in |
zoom-out |
The subsequent CSS rules define various cursor styles that can be applied to elements using corresponding CSS class selectors. These cursor styles range from default behavior like arrows (auto, default) to specific actions or states (pointer for clickable elements, wait for indicating the program is busy, etc.).
Hover Below to See How Your Cursor Change
Explore various cursor styles dynamically changing upon hover to demonstrate different types of cursors available through CSS properties.
How to Create a Mouse Cursor Using JavaScript?
We will break the process of creating a mouse cursor using JavaScript in two steps. Although we are using many CSS properties in this, the most important and mandatory step is to hide the mouse cursor on the whole body tag to make sure whatever we customize is visible without overlapping the default mouse cursor.
Step 1 - Hide a Mouse Cursor
Before jumping into the process of creating a custom mouse cursor, the first step is to hide the default cursor using the CSS cursor: none; property to make sure that when hovering over a specific div or body, the cursor: none; style is applied to that body, div's class, or ID. This CSS rule visually hides the cursor while maintaining its functionality.
Our major purpose in using this cursor: none; is the default cursor hidden so that the custom cursor defined by the .cursor class is to be displayed instead, thereby replacing the default cursor appearance.
<style>
    body {
        cursor: none;
    }
</style>

<body>
  <!-- Your HTML content here -->
</body>
</html>
In this compiler, we have embedded this simple ball as a cursor. Now, we will learn, in a step-by-step format, what functions I have used.
Step 2 - Build Custom Mouse Cursor with JavaScript
<div class="cursor"></div>We start by setting the cursor: none; CSS property so that the default cursor is hidden when hovering over the webpage.
body {
  background-color: white;
  cursor: none;
  height: 120vh;
}

.cursor {
  position: fixed;
  width: 10px;
  height: 10px;
  background-color: pink;
  border: 1px solid black;
  border-radius: 50%;
  pointer-events: none;
  z-index: 9999;
}
Here, we have defined a CSS class named .cursor to style our custom cursor.
First thing, give your cursor a fixed position so that it will stay in a fixed location on the screen. Now let's jump to designing our custom cursor into a small pink circle by giving it a width and height of 10px.
We now need our cursor to not interfere with mouse events. We will use pointer-events: none; it so that it allows clicks and interactions to pass through to elements beneath it.
And finally, we will use high z-index value so that the cursor appears above other elements on the page.
const cursor = document.querySelector('.cursor');

const positionCursor = (e) => {
  const mouseY = e.clientY;
  const mouseX = e.clientX;

  cursor.style.top = `${mouseY}px`;
  cursor.style.left = `${mouseX}px`;
}

window.addEventListener('mousemove', positionCursor);
We will now use document.querySelector('.cursor') to select the <div> element with the class cursor and store it in the variable c and positionCursor function to update the position of the cursor based on the mouse movement.
Inside the positionCursor function, we have to retrieve the clientX and clientY properties of the mouse event e, representing the horizontal and vertical coordinates of the mouse pointer (hand).
We then set the top and left CSS properties of the cursor element to these coordinates, effectively moving the cursor to follow the mouse pointers download.
Finally, we will add an event listener to the window object for the mousemove event. Whenever the mouse moves on the webpage, the positionCursor cursor function is called, updating the position of the custom cursor accordingly.
More Examples of Creating Custom Cursor with JavaScript
Here, we will now look into two examples to customize your cursor; both include the same HTML and JavaScript code from the previous process but with different CSS properties.
Example 1 - Set Custom Shape as Cursor
<div class="cursor"></div>body {
background-color: white;
cursor: none;
height: 120vh;
}
.cursor {
position: fixed;
width: 20px;
height: 20px;
background-color: pink;
border: 1px solid black;
clip-path: polygon(50% 0%, 61% 35%, 98% 35%, 68% 57%, 79% 91%, 50% 70%, 21% 91%, 32% 57%, 2% 35%, 39% 35%);
pointer-events: none;
z-index: 9999;
}We will now design a star as a cursor that is larger than the previous one, with clip-path: polygon(50% 0%, 61% 35%, 98% 35%, 68% 57%, 79% 91%, 50% 70%, 21% 91%, 32% 57%, 2% 35%, 39% 35%);. You can look into various designs for your cursor with clip-path styling.
const cursor = document.querySelector('.cursor');

const positionCursor = (e) => {
  const mouseY = e.clientY;
  const mouseX = e.clientX;

  cursor.style.top = `${mouseY}px`;
  cursor.style.left = `${mouseX}px`;
}

window.addEventListener('mousemove', positionCursor);
We will use the same JavaScript for this custom mouse cursor example, too, as we have only changed the shape of the mouse cursor.
Example 2 - Set Image as Cursor in CSS?
In this example, let's not create a cursor design with CSS, but we will input an image link into the CSS custom cursor to make the image act as a cursor.
<div class="cursor"></div>body {
background-color: white;
cursor: none;
height: 120vh;
}
.cursor {
position: fixed;
width: 15px;
height: 15px;
background-image: url('https://www.domain.com/icon-p-32.svg'); /* add URL of your image */
background-size: cover;
pointer-events: none;
z-index: 9999;
}Here, we did not make any changes to the HTML and the script of this custom mouse cursor, but we have set the background image of the cursor using a URL.
Let us use the below image's URL in this code CSS.

You should replace 'https://www.domain.com/icon-p-32.svg' with your actual image's URL. This image will be displayed as the cursor.
const cursor = document.querySelector('.cursor');

const positionCursor = (e) => {
  const mouseY = e.clientY;
  const mouseX = e.clientX;

  cursor.style.top = `${mouseY}px`;
  cursor.style.left = `${mouseX}px`;
}

window.addEventListener('mousemove', positionCursor);
Websites using Custom Mouse Cursor
Here are 7 websites that have used a custom mouse cursor, which makes their websites look good and are user-exciting.

Relume is an AI websites designing tool, they have customized mouse cursor for users within their website. They made it look like a team-designed platform.
Framer is also a website-designing tool. They customized the mouse cursor for users within their website, similar to the above example 1. They made it look like a user was editing within the platform.
StudioAI is also a designing tool, they have customized mouse cursor for users within their website similar to the above example 1 and 2, where they made it look like a audio recorder, as you can ask their AI to edit you designs.

Wiza is a lead generator tool, they have customized mouse cursor for users within their website as a magic wand to explain that their website is a magical tool.
Readymag is another website design tool. They have customized the mouse cursor for users within their website, similar to the above example 1. They made the customized cursor look like a circle.
Equals is a spreadsheet tool. They have customized the mouse cursor for users within some parts of their website into a zoom-in icon, but not the regular one.
Figma is a popular website among the above. You can see the cursor arrow is not a regular one, rather a customized mouse cursor.
Conclusion:
Customizing the mouse cursor with CSS is not just about adding style; it's about infusing your site with personality and charm. It increases user engagement through unique cursor designs, offers clear visual feedback, and improves accessibility for all users.
By using customized cursors, you can creatively express your design skills, differentiate your site from competitors, and leave a lasting impression on visitors by surprising users as they navigate your pages. This skill lets web designers and developers create visually appealing, user-friendly websites that stand out in today's competitive online landscape.
Analyze your front end errors down to the line of code
ReplayBird, a digital user experience analytics platform designed specifically to track JavaScript errors to revolutionize the debugging process by providing comprehensive insights into application errors.
ReplayBird records a comprehensive data set, including console logs, stack traces, network activity, and custom logs. With ReplayBird, diagnosing JavaScript exceptions becomes seamless. You can replay sessions, facilitating rapid debugging and resolution.

One key feature of ReplayBird is its ability to record and replay user sessions, allowing developers to recreate the exact sequence of events leading up to an error. This enables thorough debugging and facilitates understanding of the root cause of issues.
Additionally, ReplayBird's real-time error replay functionality enables developers to see errors as they occur in the user's browser, streamlining the debugging process and accelerating time to resolution.
Overall, ReplayBird's JavaScript error tracking enhances the debugging experience by providing actionable insights and facilitating efficient error resolution, ultimately leading to more robust and reliable applications.
Try ReplayBird 14-days free trial
Keep Reading more on CSS
 Uma
Uma